You can create a cloned operating system using the sample Task Sequence as a guide.
The recommended way to build an operating system image for deployment is to build a reference server with everything installed that is required for the image. Once the server is built, you run sysprep and then shut down the server.
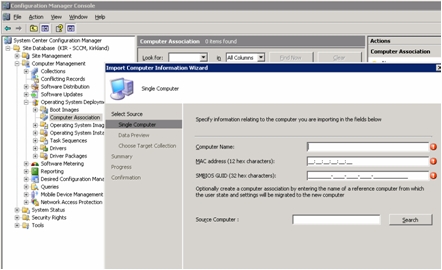
- To capture or deploy a server with Configuration Manager,
you must add the computer name, MAC address, and GUID information
for the target reference server to the Configuration Manager database
and to a collection. Add the computer name, the MAC address, and the GUID:Figure 1. Import Computer Information Wizard
- On the target server (the server that is to be captured,
in this case), set the variable that contains the location of the
operating system to be captured.
- Go to the collection with the target reference server.
Right-click the sever object; then select the Variables tab. Figure 2. Setting the OS location on the target server
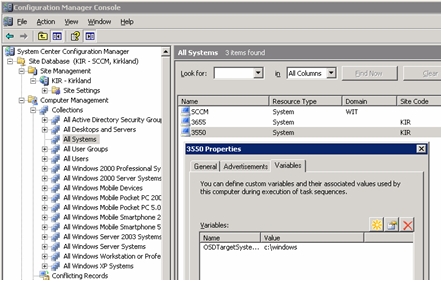
- Go to the collection with the target reference server.
Right-click the sever object; then select the Variables tab.
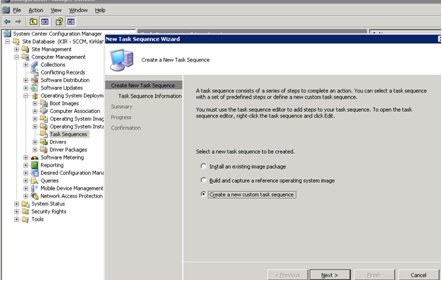
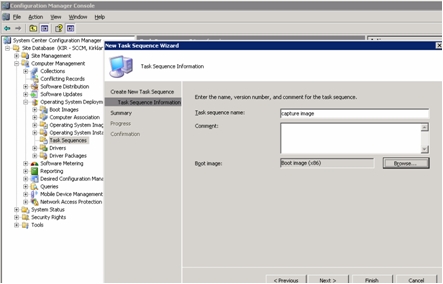
- Create a task sequence for capturing the image. Figure 3. The New Task Sequence Wizard
- Name the task sequence. Figure 4. Naming the task sequence in the New Task Sequence Wizard
- Edit the task sequence information, to include all steps
for capturing the image.
For example, fill in the path for storing the image using the share that you created in an earlier step on the Properties page of the task sequence.
Figure 5. Editing the OS capture task sequence to identify the share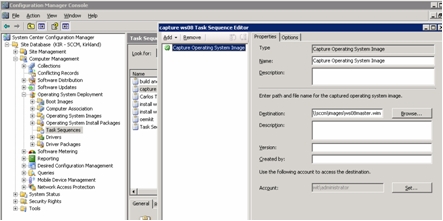
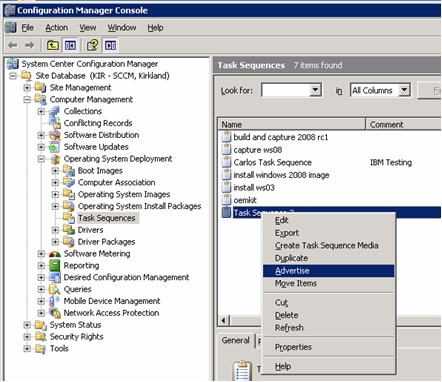
Once the task sequence has been completed an advertisement must be made. Advertisements are used in Configuration Manager to assign jobs to particular client machines – in this case, the machine that is being captured.
- Right-click the task sequence and select Advertise. Figure 6. Advertising the OS capture task sequence
- Use the New Advertisement Wizard to assign the task sequence. Figure 7. Using the New Advertisement Wizard
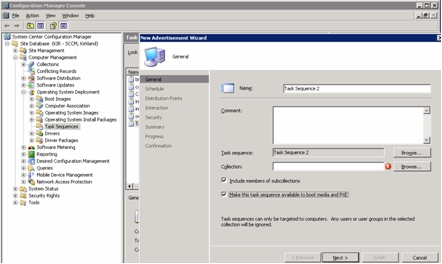
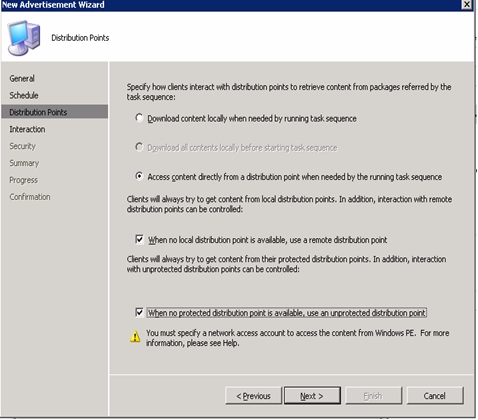
Make sure the task sequence is made available to PXE. Also select the collection that contains the target system. This is the machine that was added to the database earlier. Without being added to the database, and to a collection, the machine will never pick up the advertisement.
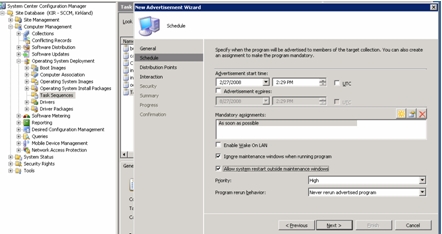
- Fill in the settings on the Schedule page. Figure 8. New Advertisement Wizard: Schedule page
- Fill in the settings on the Distribution Points page. Figure 9. New Advertisement Wizard: Distribution Points page